HousePlantJoy is supported by our audience. When you purchase through one of our links, we may earn a small affiliate commission. As an Amazon Associate I earn from qualifying purchases. Your cost is not affected.
==================
Hey there, fellow plant enthusiasts! If you’re anything like us, you probably get a thrill out of propagating new plants from your favorite houseplants. There’s something truly magical about nurturing new life from the ones you already adore. It’s a labor of love that requires patience and a sprinkle of green-thumb wisdom. But as your new plant starts to flourish, the next step is just as crucial: knowing precisely when to plant those propagated wonders, ensuring they flourish into healthy, beautiful additions to your indoor jungle.
So, get ready to embark on a journey into the world of plant propagation. In this article, we’ll unravel the mysteries of timing and teach you the art of planting these young gems at the perfect moment. We’ll equip you with the knowledge and tips you need to transform your beloved houseplants into a flourishing garden that’ll fill your space with vibrant life and beauty. Let’s dive into this green adventure together!
Propagated Plants: Perfecting Plant Propagation Timing
For those new to the gardening world, plant propagation might seem like a complex term. But in essence, it refers to the process of creating new plants from a variety of sources, such as seeds, cuttings, bulbs, and other plant parts. Propagation is a wonderful way to increase your plant collection without needing to spend a lot of money. It’s also a rewarding process that deepens your connection with the natural world.
Propagated Plants: Mastering Plant Propagation Techniques and Timing
Understanding plant propagation is crucial if you want to become a successful gardener. The process varies depending on the type of plant and its specific propagation requirements.
Some plants are best propagated through seeds, others through cuttings, and some through division. Understanding these methods will help you make the best choices for your plants and ensure their healthy growth.
Plant propagation isn’t just about creating new plants; it’s also about maintaining the health and vitality of existing ones. By propagating your plants, you can keep them healthy and vigorous, ensuring a lush, green garden year-round. Propagation also allows you to control the size and shape of your plants, making it an essential part of garden management.
Propagated Plants: The Significance of Timing in Plant Propagation
Timing is everything in plant propagation. The success of your propagation efforts largely depends on when you choose to propagate your plants. Planting at the right time ensures the plant cuttings have the best chance of developing into healthy, mature plants. Conversely, planting at the wrong time could lead to weak, disease-prone plants or even complete propagation failure.
Propagating Plants, Method Matters
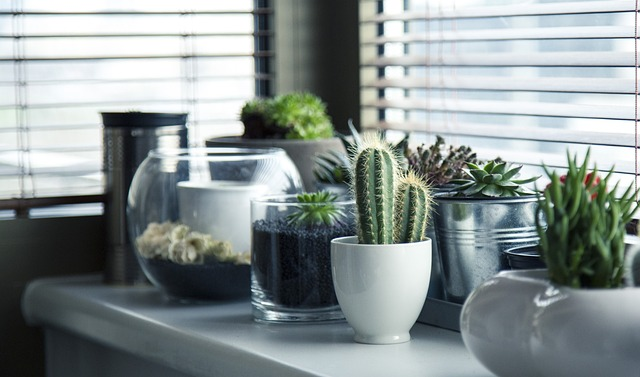
Plant propagation timing varies depending on the type of plant and the method of propagation. Many plants are best propagated in the spring when they’re in their active growth phase. However, some plants, like many succulents and indoor plants, can be propagated any time of the year. It’s essential to research the specific propagation needs of your plants to determine the best timing.
Also, keep in mind that timing is not just about the season; it’s also about the plant’s growth stage. For example, when propagating from cuttings, it’s best to take cuttings from new growth that’s not too young or too old. This increases the chances of successful rooting and plant development. Similarly, for seed propagation, it’s important to sow the seeds when conditions are ideal for germination.

When to Plant Propagated Plants for Healthier Growth
Knowing when to plant propagated plants is just as important as knowing how to propagate them. The timing for planting propagated plants depends on several factors, including the type of plant, the propagation method, and the specific growing conditions. However, a general rule of thumb is to plant propagated plants when they have developed a robust root system.
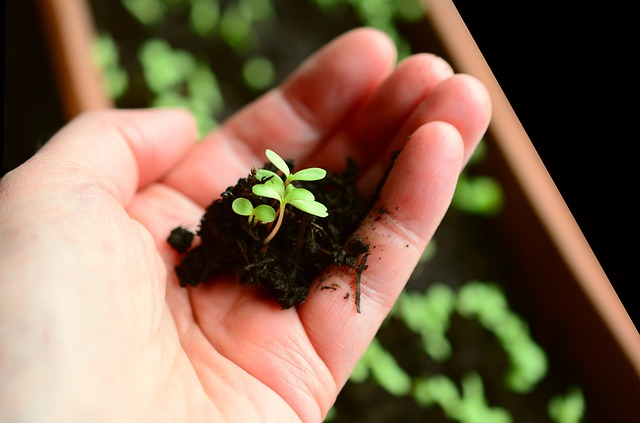
Seed Propagation
For seeds, the best time to plant is when they have germinated and developed their first true leaves.
Timing for Cuttings
For cuttings, it’s best to plant them when they have developed strong roots.
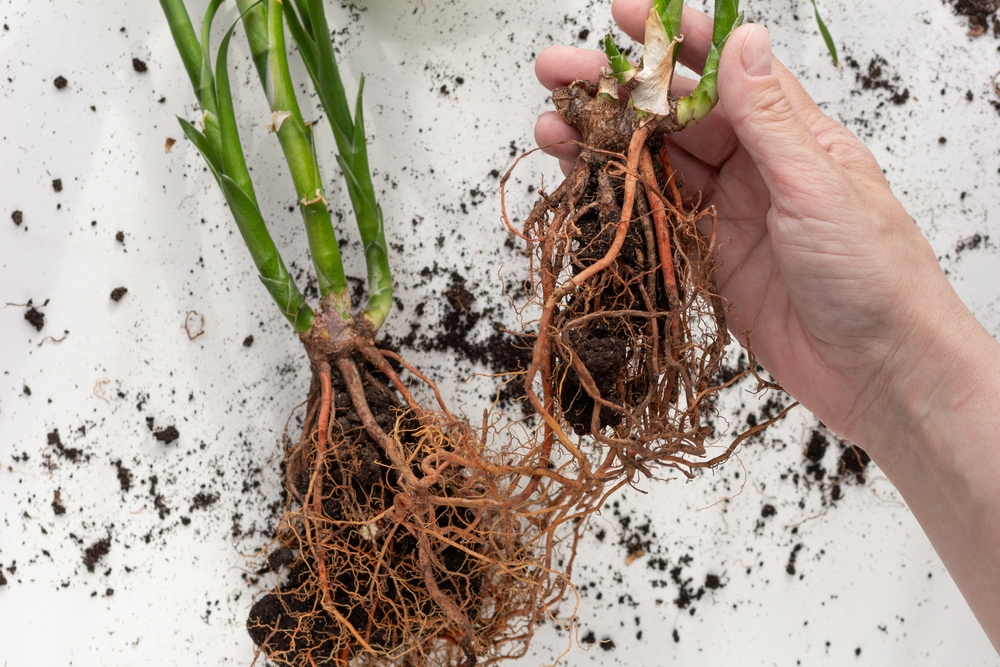
Divisions Have Developed Roots
And for divisions and bulbs, the ideal time to plant is immediately after division or when the bulb is dormant.
The goal is to plant propagated plants at a time when they can quickly establish themselves in their new environment. This usually means planting during a period of active growth, typically in the spring or fall. However, always research the specific needs of your plants to ensure you’re planting at the optimal time.
Propagated Plants: A Step-by-Step Guide to Planting
Planting a propagated plant might seem like a daunting task, especially if you’re new to gardening. But with a little knowledge and preparation, it can be a simple and rewarding process. Here’s a step-by-step guide on how to plant a propagated plant.
- Prepare the planting site: The first step in planting a propagated plant is preparing the planting site. This involves selecting a suitable location, ensuring it has the right light, temperature, and soil conditions for your plant. Also, make sure the site is free from weeds and other potential pests.
- Prepare the plant: Next, prepare the plant for planting. This involves carefully removing the plant from its propagating medium, whether it’s water, soil, or another medium. Be gentle to avoid damaging the delicate roots.
- Plant the propagated plant: Dig a hole in the prepared planting site that’s the right size for your plant. The hole should be deep enough to accommodate the plant’s roots and wide enough to allow for future growth. Place the plant in the hole, making sure the top of the root ball is level with the soil surface, and backfill with soil.
- Care for the planted plant: After planting, water the plant thoroughly and apply a layer of mulch around the base to conserve moisture. Continue to monitor the plant’s growth and adjust its care as needed.

Can You Put Cuttings Straight Into Soil? Pros and Cons
One of the common questions in plant propagation is whether you can put cuttings straight into soil. The answer is yes, you can; however, this method has both pros and cons.
The advantage of putting cuttings straight into soil is that it’s a natural process that closely mimics how plants propagate in the wild. The soil provides the cutting with the nutrients it needs to grow and develop robust roots. This method also eliminates the need for a transition phase from water to soil, reducing the risk of transplant shock.
Potting Soil Matters
On the downside, putting cuttings straight into soil can be risky. The soil can harbor diseases and pests that could harm the cutting. Also, it can be challenging to maintain the optimal moisture level in the soil, increasing the risk of root rot.
Ultimately, whether you should put cuttings straight into soil depends on the specific plant and your comfort level as a gardener. Some plants root easily in soil, while others do better in water or another propagation medium. Experiment with different methods to find what works best for you and your plants.
Planting Propagated Plants: Best Practices
Planting propagated plants requires careful planning and execution to ensure their healthy growth. Here are some best practices to follow when planting propagated plants.
- Choose the right time: As discussed earlier, timing is crucial when planting propagated plants. Choose a time when the plant is in its active growth phase and has developed a robust root system. Also, consider the specific needs of your plant and the local growing conditions.
- Prepare the planting site: Before planting, prepare the planting site by ensuring it has the right light, temperature, and soil conditions. Also, weed the area and check for pests.
- Handle the plant carefully: When transferring the plant from its propagation medium to the planting site, handle it gently to avoid damaging the roots. If the plant is in water, allow it to drain before planting.
- Water and mulch after planting: After planting, water the plant thoroughly to settle the soil around the roots. Then, apply a layer of mulch to conserve moisture and suppress weeds.
- Monitor the plant’s growth: Keep a close eye on the plant’s growth after planting. If the plant shows signs of stress, such as wilting or yellowing leaves, adjust its care as needed.
When to Pot Propagated Plants: Timing and Techniques
Potting propagated plants is a crucial step in their development. It allows the plants to grow in a controlled environment before they’re ready to be planted in the garden or a larger pot. The timing for potting propagated plants depends on several factors, including the type of plant, the propagation method, and the plant’s development.
Good Root Growth
Generally, it’s best to pot propagated plants when they have developed a strong root system. For cuttings, this usually means when the roots are at least an inch long. For seeds, it’s when they have developed their first true leaves. However, always research the specific needs of your plants to ensure you’re potting at the optimal time.
When Potting Propagated Plants, Follow These Steps:
First, choose a pot that’s the right size for your plant. It should be large enough to accommodate the plant’s roots, but not so large that the plant will be swamped.
Next, fill the pot with a suitable potting mix, making sure it’s well-draining to prevent waterlogging.
Then, make a hole in the center of the potting mix and gently place the plant in it, ensuring the roots are fully covered.
Finally, water the plant thoroughly and place it in a location that suits its light and temperature needs.
Transferring Water Propagation to Soil: How and When
Transferring water-propagated plants to soil is a delicate process that requires careful timing and technique. The transition from water to soil can be stressful for plants, so it’s important to do it at the right time and in the right way.
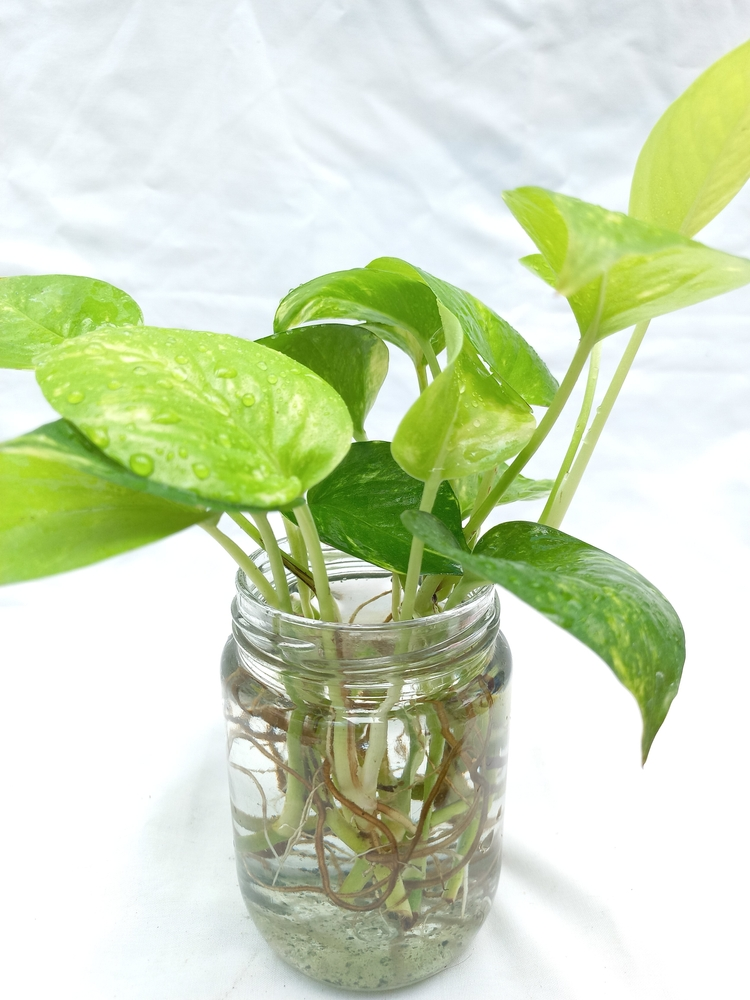
Rooted Cuttings From Water Propagation
The best time to transfer water-propagated plants to soil is when they have developed a robust root system. This usually means when the roots are at least an inch long and have multiple offshoots. At this point, the plant is strong enough to withstand the transition to soil and is more likely to thrive.
Transferring Water-Propagated Plants to Soil: Essential Steps
Here are the essential steps for transferring water-propagated plants to soil in a bulleted format:
- Allow the plant to drain to remove excess water without letting it dry out completely, ensuring the roots remain wet.
- Prepare a pot with a well-draining potting mix to prevent waterlogging.
- Create a hole in the center of the potting mix and gently place the plant in it, ensuring the roots are fully covered.
- Water the plant thoroughly and position it in a suitable location based on its light and temperature requirements.
Potting Cuttings: A Detailed Guide
Potting cuttings is a crucial step in plant propagation. It allows the cuttings to grow in a controlled environment before they’re ready to be planted in the garden or a larger pot. Here’s a detailed guide on how to pot cuttings.
- Choose the right pot: The first step in potting cuttings is choosing the right pot. It should be large enough to accommodate the cutting’s roots but not so large that the cutting will be swamped. Also, ensure the pot has adequate drainage to prevent waterlogging.
- Prepare the potting mix: Next, prepare the potting mix. It should be well-draining and rich in nutrients to support the cutting’s growth. Buy a good commercial potting mix or make your own using a combination of peat moss, perlite, and compost.
- Plant the cutting: Make a hole in the center of the potting mix and gently place the cutting in it, ensuring the roots are fully covered. If the cutting is a stem cutting, make sure at least one node is buried in the potting mix.
- Water and care for the cutting: After planting, water the cutting thoroughly to settle the potting mix around the roots. Then, place the pot in a location that suits the cutting’s light and temperature needs. Continue to monitor the cutting’s growth and adjust its care as needed.
How to Pot Propagated Plants for Optimal Growth
Potting propagated plants properly is crucial for their optimal growth. Here are some tips on how to pot propagated plants for optimal growth.
- Choose the right pot: The pot should be large enough to accommodate the plant’s roots but not so large that the plant will be swamped. Also, ensure the pot has adequate drainage to prevent waterlogging.
- Use a good potting mix: The potting mix should be well-draining and rich in nutrients to support the plant’s growth. Purchase a commercial potting mix. Or make your own using a combination of peat moss, perlite, and compost.
- Plant the plant properly: Make a hole in the center of the potting mix and gently place the plant in it, ensuring the roots are fully covered. If the plant is a stem cutting, make sure at least one node is buried in the potting mix.
- Water and care for the plant: After planting, water the plant thoroughly to settle the potting mix around the roots. Then, place the pot in a location that suits the plant’s light and temperature needs. Continue to monitor the plant’s growth and adjust its care as needed.
In this YouTube video, the YouTuber did an experiment on light’s impact on propagation.
Video Credit: @TechplantChannel
How to Pot a Plant in Water: Steps and Tips
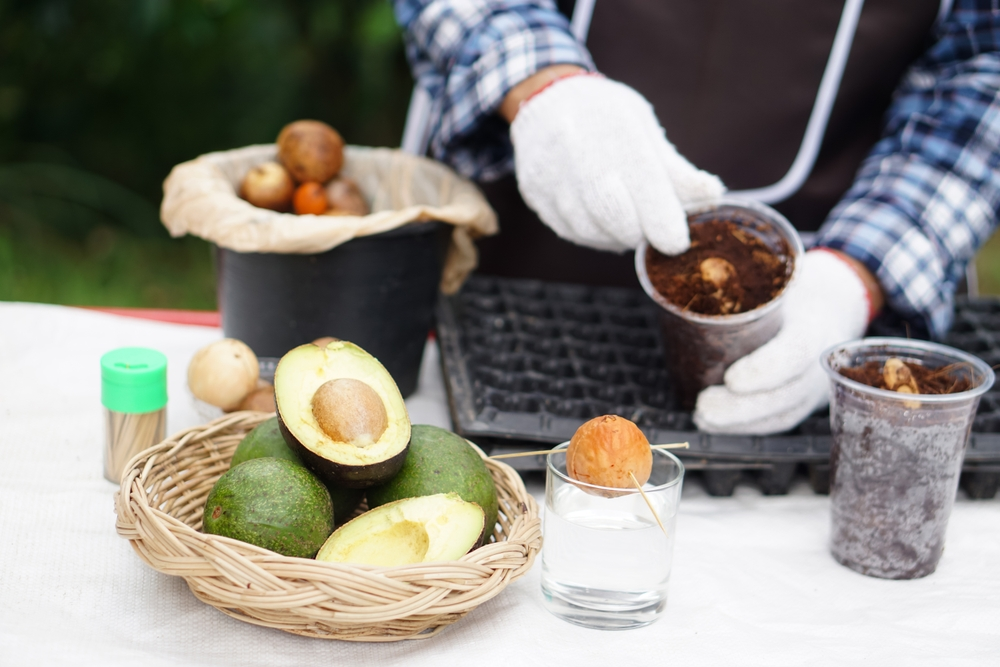
Potting a plant in water, also known as water propagation, is a simple and effective way to propagate many types of plants. Here are some steps and tips on how to pot a plant in water.
- Choose the right container: The container should be clear to allow light to reach the roots and large enough to hold the plant and its roots comfortably. Also, it should be clean to prevent the growth of algae and bacteria.
- Prepare the plant: Next, prepare the plant for water propagation. If it’s a stem cutting, make sure it has at least one node, which is where the roots will grow. If it’s a leaf cutting, ensure it’s healthy and free from disease.
- Place the plant in water: Place the plant in the container and fill it with water until the roots or node are submerged. Do not submerge the entire plant, as this could cause rot.
- Change the water regularly: Change the water regularly to keep it fresh and oxygenated. This is usually every week or so, but it can vary depending on the plant and the water quality.
- Transition to soil when ready: Once the plant has developed a robust root system, it’s ready to be transitioned to soil. Follow the steps previously mentioned in the “Transferring Water Propagation to Soil” section.
How to Move Cuttings from Water to Soil: A Comprehensive Guide
Moving cuttings from water to soil can be a delicate process. Here’s a comprehensive guide on how to do it.
- Wait for the right time: Wait until the cuttings have developed a robust root system before transitioning them to soil. This usually means when the roots are at least an inch long and have multiple offshoots.
- Prepare a pot with potting mix: Choose a pot that’s the right size for your cuttings and fill it with a suitable, well-draining potting mix.
- Gently remove the cuttings from the water: Gently remove the cuttings from the water and allow them to drain.
- Plant the cuttings in the pot: Make a hole in the center of the potting mix and gently place the cuttings in it, ensuring the roots are fully covered.
- Water and care for the cuttings: After planting, water the cuttings thoroughly and place the pot in a location that suits their light and temperature needs. Continue to monitor their growth and adjust their care as needed.
Key Takeaways: When to Plant Propagated Plants for Healthier Growth
Plant propagation is a rewarding process, but it requires careful planning and execution to ensure the healthy growth of your plants. Timing is crucial, both when propagating and when planting. Remember that the optimal time to plant propagated plants is when they have developed a robust root system.
Also, keep in mind the importance of choosing the right propagation method and the right planting site. Handle your plants gently during the propagation and planting process to avoid damaging their delicate roots.
And finally, monitor your plants’ growth and adjust their care as needed to ensure their health and vitality.

Propagated Plants: Cultivating Green Success in Your Garden
To wrap it up, remember that plant propagation is a skill that gets better with practice. Whether you’re a seasoned gardener or just starting out, understanding the right timing for planting propagated plants is a valuable asset for nurturing a thriving and colorful garden. So, keep these tips in mind as you embark on your propagation journey, and may your gardening adventures be filled with success and joy!
If you’re eager to dive deeper into the world of plant propagation and explore more gardening insights, we invite you to be a part of our vibrant community. Stay connected by subscribing to our newsletter, visiting our website for a wealth of valuable information, and joining our community of enthusiastic plant lovers. Happy planting and here’s to bountiful growth ahead!
Get Your Green On! ???
Ready to dive into the wonderful world of plants and houseplant care? Join our vibrant community where we share tips, tricks, and the latest on plant propagation and all things green. Connect with fellow plant lovers on Facebook, catch our visual garden on Instagram, save your favorite plant inspo on Pinterest, and stay up to date with our tweets on Twitter.
Don’t forget to subscribe to our newsletter for exclusive plant wisdom! Let’s grow together! ??? #PlantLovers #GreenThumbs #HouseplantJoy”
Frequently Asked Questions
What's the best season for planting propagated plants?
Timing is everything when it comes to propagated plants. While you can propagate some plants year-round, the best season often depends on the specific plant you’re growing. Spring is generally ideal for many common houseplants and outdoor plants, as it aligns with their natural growth cycle. However, some tropical plants thrive when planted in the warmer summer months. So, it’s essential to research the particular needs of your plant to give it the best start for healthier growth.
Can I plant propagated plants in the same pot as the parent plant?
Mixing the generations, huh? It might sound like a cool family reunion, but it’s not always the best idea. When you plant propagated plants in the same pot as the parent, they might end up competing for resources, which isn’t great for their growth. It’s generally a good practice to provide your little ones with their own space and soil to ensure they get the love and nutrients they need.
How do I know when my propagated plant is ready to be planted in soil?
Great question! You’ll know it’s time to transfer your plant when it has developed healthy roots. Give the roots a gentle tug (not too hard, you’re not arm wrestling) and if they resist, it’s a sign they’re strong and ready. Also, watch for the emergence of new growth, like leaves or stems, as this indicates the plant is eager to stretch its roots in some fresh soil.
What's the secret to watering newly planted propagated plants?
When you first plant your little green buddies, they’re like babies needing extra care. Water them enough to keep the soil consistently moist, but avoid overwatering that could drown them – we don’t want to reenact the Titanic here! Remember that too much water can lead to root rot, which is a gardener’s worst nightmare. As they grow and establish themselves, you can adjust your watering routine to suit their specific needs. It’s all part of the nurturing journey to healthier and happier propagated plants.